
Hey everyone!
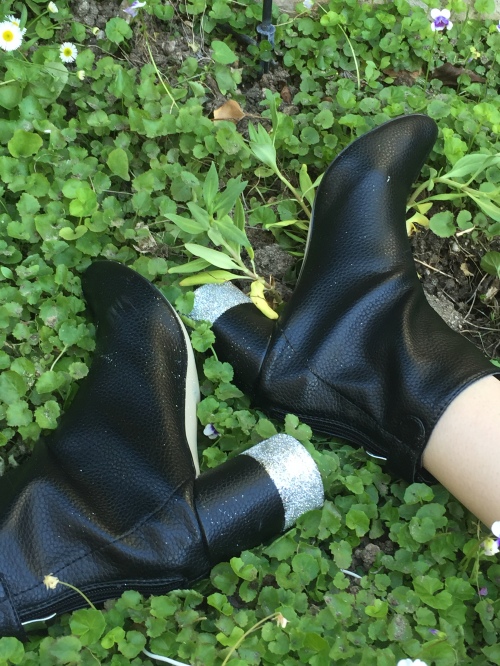
I haven’t sat down to write a blog post in what feels like forever, but I promise that I’m going to make up for it because today I glitter-fied my boots. Yep, that’s right. I’m going to be sharing how I made these boots way cooler than they were before!
I wore these boots in my last outfit blog post when they were still plain, and I always had the intention of doing something with them. I really could’t justify owning another pair of plain black boots (new game: figure out how many times I’ve mentioned my love for black boots in the 1.5 years of running this blog). I wasn’t sure if I was going to have someone paint on them for me, but I finally decided that I was just going to do something myself. I was worried that anything I might do to these shoes would mess them up, but glitter seemed pretty harmless. I did three easy steps…
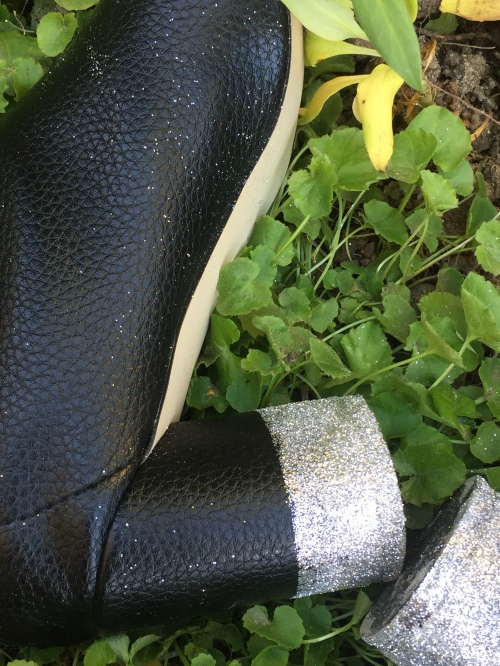
- Use tape to create a straight line across the heel. I used tape that wasn’t clear just so that I could be sure that I had it in the right place and that it was even. I simply just wrapped the tape around the heel and made sure it was where I wanted it. Make sure that you use tape that will be easy to peel off; regular tape or duct tape isn’t a great idea. I used some scrapbook tape that I knew would be easy to remove.
- Spray the area underneath the tape with adhesive glue. I found a can of this and decided to use it. In my opinion, I think it’s a lot easier than if you were to use any other form of glue. It’s pretty watery, but it definitely holds the glitter to an area well. It’s super important to make sure the glue only goes on the area underneath the tape. If not, glitter is going to stick in places you didn’t want it to.
- Pour the glitter underneath the tape where the glue has been applied. I had a can of glitter and just poured a lot of it over the heel. I was considering using a brush, but I figured that it would require a lot more layers and also would take so much longer.
This whole process took me about five-seven minutes. It’s seriously so easy, and my shoes look a lot cooler now that they’re glittery. I recommend that you do this outside, because I know glitter can be a bit annoying at times. It tends to go everywhere, so make sure you’re in an open space with newspaper underneath you. Do not put any sort of towel or rag underneath; if glue gets stuck to it (and it most likely will), you’ll have to throw it away.
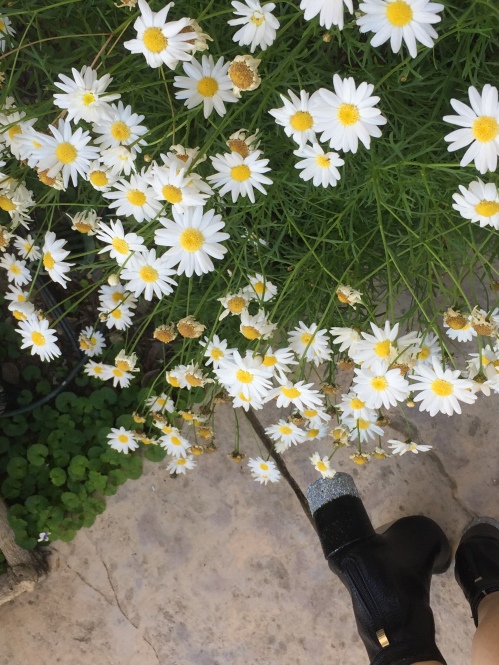
The glue dries pretty quickly, but I recommend letting them sit for a few hours before you wear them. I wore mine only a few minutes after making them for these pictures, and I need to go back and touch up some areas. The great thing about the process is that it’s so easy. Touching your shoes up will only take a couple of minutes. 🙂
I’m going to leave links to the exact materials I used below. If you have any questions, don’t be afraid to leave a comment!
Here’s what I used:
Claire Cylinder Heel Sock Boots in Black from Boohoo
Talk to you soon!
-Emily Berrol

I love these! Glitter makes them just so fun!
love, elena
https://outnabotweb.wordpress.com
LikeLiked by 1 person
Thanks! X
LikeLiked by 1 person
Such an original idea! Love the boots!
Thanks so much for this lovely post and lets follow each other!
Love from https://tbymallano.com/
LikeLike
Thank you! X
LikeLike
Ahhh! Such an original heel!
LikeLike
Aw thanks, glad you like it too! X
LikeLike